 |
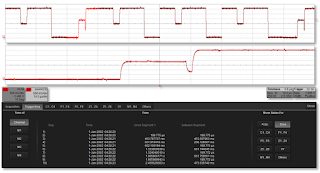
| Figure 1: Sequence mode grabs rare triggered events from long captures and stores them in segments |
The real issue with long captures interspersed with rare events of interest is that you might run out of acquisition memory before you get even one trigger. What if you could take that entire waveform memory, however long it is, and break it up into segments? That's essentially what Sequence mode does. Each time the oscilloscope is triggered, it stores the event in a separate waveform segment and then stops using acquisition memory until it's triggered again. You can set Sequence mode to divide the memory into a minimum of two segments to a maximum of up to 10,000. The default setting is 10 segments.
In this way, you can keep your desired sampling rate and horizontal time base setting. Each segment is time stamped with the time of day, the time between segments, and the elapsed time since the first segment. Segments are displayed in adjacent displays, and zoom traces can be used on multiple segments for comparison purposes.
 |
| Figure 2: History mode lets you scroll back in time to see previously captured waveforms |
With History mode, you can scroll back and forth through time to find glitches, runts, and other problems that you may not have known to look for (Figure 2). How often have you been watching a waveform on your oscilloscope's display when, whoa, something catches your eye, but you're way too slow to stop the trigger to freeze it? This is where History mode has your back. It's stored all those previous waveforms and you can easily scroll back through them to apply measurements and analysis.
Figure 2 shows an example of an acquisition in spectrum-analysis mode and with History mode turned on. At top right is the time-domain display with a zoom trace beneath it. In the center is the FFT display with markers turned on to denote peaks. Those markers are tabulated to the left, and to the far left is the table of History mode segments. Selecting any line in that latter table will automatically bring up that waveform in both time- and frequency-domain views.
Our next post will take a closer look at math functions.
Previous posts in this series:
Getting The Most Out Of Your Oscilloscope: Setup
Getting The Most Out Of Your Oscilloscope: Navigation with MAUI
Getting The Most Out Of Your Oscilloscope: Trigger Delay
Getting The Most Out Of Your Oscilloscope: Documentation
Getting The Most Out Of Your Oscilloscope: Cursors and Parameters
Getting The Most Out Of Your Oscilloscope: Tracks and Trends
Getting The Most Out Of Your Oscilloscope: WaveScan and XDEV Custom Parameters
No comments:
Post a Comment